By Aleah Fitzwater, Guest Blogger
Hello there! My name is Aleah. I am a classical flutist with a degree in instrumental music education. I am so thankful to be featured here on MR A Music Place. Here’s a big shoutout to Robert for the feature.
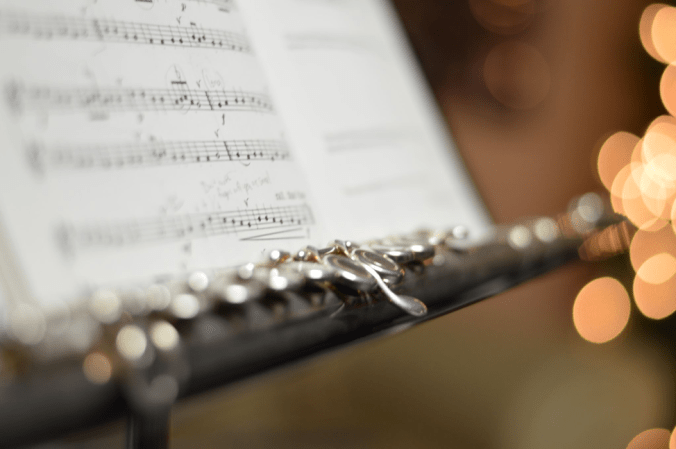
Ah, the flute. One of the most notoriously difficult instruments for both beginners and band directors alike. (Might I also add how this flute stock photo has a lovely aesthetic, but that it is never a good idea to encourage flutists to put their instruments on a music stand?! I thought I’d give you a good music-educator laugh there…) But before I delve into tips and tricks on how to help your students get a consistent sound, let’s take a minute to talk about why it is that the flute is such a difficult instrument for beginners.
So, What Makes It So Difficult?
For starters, flutes require about as much air as tubas. This is because flutes lose two-thirds of their air that they work with because it goes over (instead of inside) the embouchure hole. The remaining one-third of the air that makes it inside the instrument is what we are left to play with.
Another factor is that the flute is much more difficult to make a sound on if you have any asymmetry in your lips or even a cupid’s bow. Anyone can play the flute, but it is definitely harder for some to start than others. Experimentation is the key to finding the sweet spot. Oftentimes, an offset embouchure is the answer.
The flute is a rarity in a sense because it has little to no back pressure or resistance. In a way, resistance can feel like ‘feedback’ from the instrument itself. When you play the flute and there is no resistance, for students who have, say, switched over from trumpet, there are going to be some huge adjustments.
I’d also argue that the flute is one of the most difficult instruments for beginning band students to hold. Everyone else gets to hold their instrument or mallets straight in front of them! Add small hands and shorter arms into the mix, and you have a recipe for frustration. Speaking of, I always like to suggest curved head joints for beginners, when possible. It takes away some of the cumbersome, unstable feeling of initially holding the flute, and allows students to focus more on tone.
Teaching the Initial Tone
When trying to make the initial sound on the flute, students often need to give the instrument more air pressure. Lack of air pressure and air focus are two things that will absolutely foil your plan for a rich and consistent tone. Here are a few more specific tips on how to teach the initial tone so that the student focuses their air:
Encourage them to Blow Down Many flute teachers would tell you to blow across, but, this doesn’t quite make sense. If the flute, by nature, causes you to lose two-thirds of your air over the top, then we better try and get as much into the instrument as possible. Encourage students to blow down, but be sure to go around and check to make sure they aren’t covering too much with their top lip.
Moving on Up: Working on the Higher Notes
It’s a well-known fact that the flute gets progressively harder for beginners as they learn notes in the mid to high register. When students are working in the mid-range, encourage them to blow down somewhat. Corners should be activated as well, but the base embouchure for this range is relatively relaxed.
Next up: high notes. While directing the airstream up is a fast fix to initially achieve high notes, it usually results in a sharp intonation and inconsistency later down the road. Again, I recommend blowing down. In fact, it is more crucial that students blow down in the top register than it is in any other range. Blowing down increases the richness of tone, and flattens the pitch. This is because the more you blow down, the more the embouchure hole is covered, and thus the closer the note gets to being in tune. It’s natural that the flute gets sharper in its high range because you are playing up higher on the harmonic series. Eventually, you want your flute students to be able to get the note, and then bring it down it in pitch. ( Side note: I would also start note bending exercise with flutes within the first year).
The sooner you can get your flutes blowing down on higher notes like the Bb above the staff, the better your players will be at blending into an ensemble, both tone, and intonation-wise. If you find that the student isn’t getting a focused sound in the upper register, try having them use an offset embouchure instead of using a centered one or directing the air up.
Talk About Corners When it comes to woodwinds, corners are usually something that is reserved for reed players. But, I think we can take a tip from the saxes here. If you find your student making an ‘Ooo’ face, or even, as I affectionately call it, a fish face, tell them to pull back their corners. Activating the corners does a few things. It’s a fast solution if there is too much embouchure hole being covered, or simply not enough muscle tension in their embouchure.
Use Tonguing to get the Sound This one is a bit of a cheat tip, but in a good way. Do you know how beginning flutists almost always start out articulating with “huh” or “lu” sound? If you teach proper tonguing and mouth shape first, it is much easier for the student to get a solid sound. That’s because the sound of the flute (again, much like the saxophone) is largely dependent on tongue placement and mouth shape. Try teaching the student to tongue a single quarter note with a ‘sharp tongue’, and a ‘ta’ syllable. This will cheat them into an initial sound, because ‘ta’ has a stronger air pressure than that’ huh’ or ‘lu’. After they can get a consistent sound, you can teach them to extend the air pressure beyond the articulation.
Fix Their Shoulder Posture, and Tone Will Appear I was recently on Zoom with one of my new flute students. She normally has a really consistent sound, but she was started to get frustrated with her low F’s. It was then that I realized she had her sheet music on the floor and was looking down to read. Once I moved her to her piano where she could put her music up on a stand, her low F’s began to sing.
If all else fails, try fixing posture to get the tone to appear. Slumped shoulders and looking down, specifically, are a recipe for bad tone and inconsistency.
Manipulatives
I’d love to say that I had one singular, surefire way to get the beginning flutist to make a consistent sound. But, as we all probably know by now, that just isn’t the case. That being said, here are some of my favorite methods to help a student get a consistent sound.
Have them Watch Themselves with Mirrors
 You can often find small mirrors at the Dollar store. Before investing too much of your budget, check here first. I have heard brass instructors recommend playing in mirrors too. For the flutist, being able to watch yourself will allow you to check corners, as well as condensation markings. Tell students to watch the lip plate. Ideally, their embouchure will create a triangle-shaped condensation mark when they play. This means their lips are centered and focused. You can also find a student who is playing consistently, and have the others flutists watch them up-close. Flute-by-induction, if you will.
Rice Spitting
I know, I know, this one is messy. I picked up this trick from a flute camp I was a TA at one summer. It’s probably best executed during, well, not a pandemic.

Start off with a kiddie pool and some rice. Have a competition between the students to see how far they can spit the rice. Later, explain that you need to use that same pressure of spitting rice, to get the initial sound to come out of the flute. Once they get back to playing their flutes, have them ‘spit rice’ with that ‘ta’ ‘P-tu’ spitting sound.
I realize that this isn’t really practical for day-to-day band lessons, so I recommend having a sectional teacher come in and do this. You can also simply use it as an anecdote for how they can get a sound.
Beginning Flute Habits to Watch Out For
There are several sneaky habits to watch for when it comes to beginning flute students.
Hiding Their Pinkie Beginning flutists often have shy pinkies. That is, they hide their left-hand pinkie underneath the Ab key. As you can imagine, this causes quite a problems when it comes time to learn Ab. Watch beginning flutists closely to make sure they aren’t hiding their pinkies when they first learn to hold their instrument.
Improper Wrist Alignment As a classical flutist, I would say that improper wrist alignment is much more of a concern than flute angle. This might sound controversial, but, here’s why:
- An unsupported wrist will sacrifice technique, and, at its worst, increase the likelihood that the player will develop carpal tunnel.
If your flutes are tilting their instruments down, don’t fret too much. As long as their shoulders are back and their wrists are not dropped, they have a decent posture.
Rolling Their Lips Under When students roll their top lip under, it often results in an airy and inconsistent sound. For me personally, I play with an offset embouchure, because my lips are not symmetrical. Encourage students to find their sweet spots in their sound by moving their top lip to either side, if centered playing is not working out for them. Watch out for the top lip rolling under though. In my experience, it creates too small of an embouchure and results in inconsistency and fuzziness.
Conclusion
While the flute is initially a very difficult instrument to create a consistent tone on, many will find that, once this is achieved, students’ progress becomes much faster. I hope you found these tips to be helpful. I’m sure that your flutists will be able to keep up with the clarinets and saxophones in no time. Good luck, band directors!
Be sure to come back to MR A’s Music Place for more great music education content!
About the Author
 Aleah Fitzwater is a freelancer, flutist, educator, and blogger. She teaches people how to digitize their music using Optical Music Recognition by writing tutorials on the ScanScore Blog: https://scan-score.com/en/scanscore-blog/ Aleah is also a visual artist and flutist. You can find her personal projects here: https://aleahfitzwater.com/
